For the last few years, I’ve written quite a bit on this site about cutting the cord and finding ways to dump your expensive cable or satellite TV package.
There are a lot of ways to get the entertainment options you want, including watching streaming shows online, using a device like a Chromecast to watch streaming video services, or even setting up software like Playon to aggregate all of your online video that you can view on a connected device, or even record streaming shows for you.
In a recent post that I wrote about using a digital antenna to get HDTV programming, one reader mentioned that if they canceled their cable TV package, they would miss their cable company’s DVR because they like to record entire series of their favorite shows, football games, and so on. Another commenter chimed in that they would suggest checking out the Tablo TV over-the-air DVR.
I reached out to the company that makes the Tablo device, Nuvyyo, and asked if they might be able to send out a device for me to review. They were kind enough to do just that. So let’s take a look at the Tablo TV Over-The-Air HDTV DVR!
Check out our review of the new Tablo Dual HDMI DVR
Quick Navigation
Unboxing The Tablo Over-The-Air DVR
Here is an unboxing video and review of the Tablo Device’s interface:
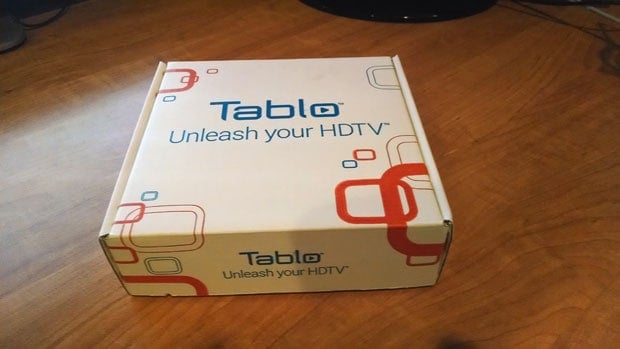
I received the Tablo over-the-air DVR in a plain brown box. Once I opened the package there was another box inside, a white one with a orange and blue design on the outside and the text “Tablo – Unleash your HDTV” on the top.
Ok, let’s get to the unleashing! (Check out the full gallery of unboxing photos on Google Plus)
When you open the container there is a quick start sheet on top giving you the basics of setting up the device, as well as information about downloading the Tablo app for both iOS and Android.
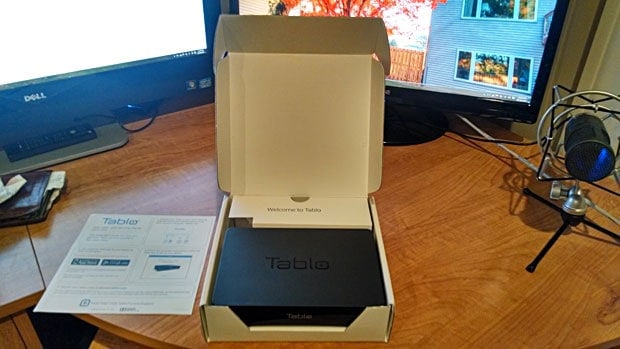
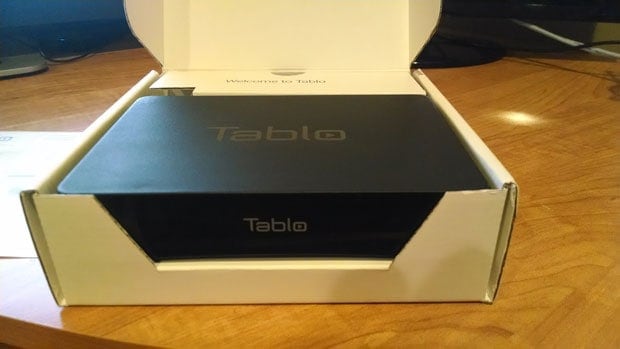
Underneath the quick start sheet is the device itself. Above the device on the box it reads, “Welcome to Tablo”.
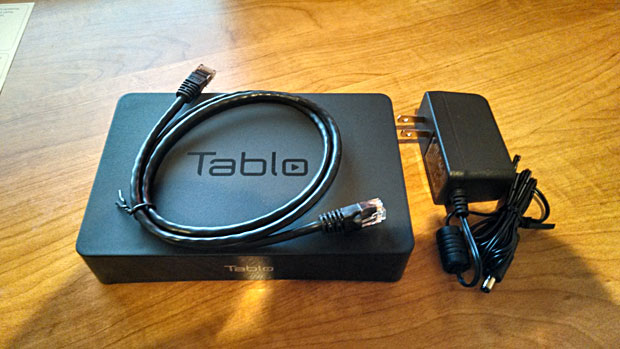
After taking your Tablo out of the box you’ll find two other things in the box besides the device itself. There is a power adapter and a 3-foot ethernet cord for connecting it to your home network. If you’re looking for the remote, stop looking, there isn’t one. The device is controlled by the Tablo app on your tablet, smartphone, or PC.
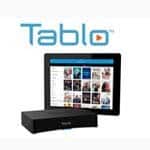
If you turn the Tablo device around, you’ll see a bunch of different connections, ports and buttons on the back. From left to right you’ll have the power port, a reset button, ethernet port, 2 USB ports and a connection for your digital antenna. Not too complicated.
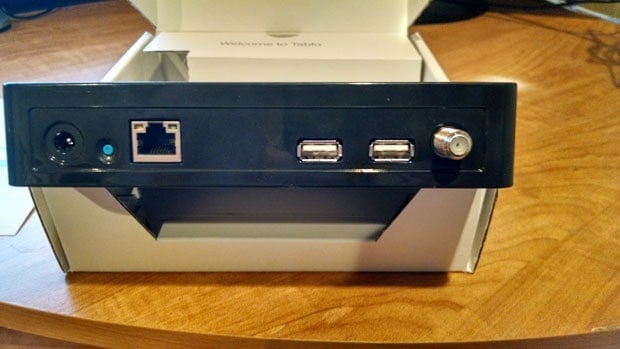
If you’re expecting to see an HDMI port to connect the device to your TV, there isn’t one. The device streams your live TV or recorded content to your connected devices over the home network or via WiFi. You can view your content on a computer, a tablet through the app or via your TV with a compatible device like the Google Chromecast (which I have), Roku 3, Fire TV Cube or Apple TV. So no direct connection is needed (but if you want to watch on your big-screen TV, a compatible device IS needed). NOTE: After this review was originally written Tablo released 2 HDMI compatible devices, allowing you to connect directly to the TV. So you can now connect without the need for additional devices.
Tablo TV Device Specs & Features
So let’s take a look at a few of the specs for the Tablo TV device. First of all, just how big is it?
- Height: Dual Tuner: 1.42″, Width: 6.85″, Depth: 4.57″.
- Weight: Dual Tuner: 12.9oz, Quad Tuner: 14.5oz
As I mentioned above it’s a decent size, but not huge. Certainly not as large as most DVRs that your cable company will send your way. I would say it’s about the size of a large USB desktop hard drive.
Here are a few more specs:
- 2 ATSC digital tuners (or 4 depending on which unit you buy)
- 10/100 ethernet port
- 2 USB port (Although only 1 drive currently supported. That should change in the future)
- WiFi included: 802.11n dual band 2.4 and 5Ghz with MIMO
- Upgradeable firmware
- RAM 512 MB (2 Tuner), 1GB (4 Tuner)
- Flash 1 GB
- Bluetooth 4.0 (for future applications)
Tablo DVR Features
94 of the top 100 shows are available over-the-air on broadcast network TV. (source)
So what are some things you can do with the Tablo?
- Watch, pause and record live TV
- Skip commercials
- Schedule recordings
- Manage existing recordings
- Record up to 2 shows simultaneously
- Watch on up to 6 devices simultaneously
- Watch on PC/Mac or iPhone/Android smartphone via browser
- Stream live AND recorded shows anywhere in the world
- Streaming to TV via Apple TV/Roku/Fire TV/ Chromecast (More devices planned in the future)
- iPad & Android tablet app interface
Essentially, the Tablo Device allows you to record all of your favorite over-the-air shows and watch them on all of your home devices whether it’s the TV, tablet or smartphone. You can watch live TV as well, or record a show and start watching it late before it’s done recording so you can skip commercials. You can also stream the shows to watch remotely. In other words, it’s a cord cutters dream!
Things You’ll Need To Use Tablo
There are a few things you’ll need to get the Tablo DVR up and running.
- Digital antenna
- USB hard drive (thumb drives not supported)
- WiFi Connection
- Computer, tablet or smartphone.
There are apps currently available for iOS, and Android, as well as on Fire TV and Roku. There is also a web-based interface for those without iOS or Android devices.
- Native iPad tablet app for iOS 7+
- Native Android tablet app for Android OS 4.1+ (You need this or a desktop computer if you want to cast your shows to Chromecast)
- Web-based interface for PC/Mac, smartphones, SmartTVs etc.
- Roku channel app
- Fire TV app
Setting Up The Tablo TV DVR
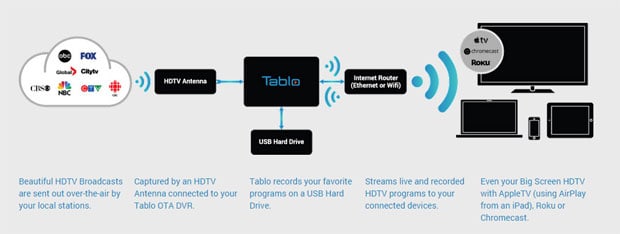
Setting up the Tablo device the first time didn’t take very long. First, I had to plug the device into my Mohu Leaf 50 digital antenna (review here), and then hooked it up to the ethernet connection (it will also allow you to hook up to the WiFi if you prefer). Finally I connected a 2TB USB hard drive and plugged it in to power it up. Here’s a quick look at how the device is setup, and how it streams to all of your tablets, phones and TVs.
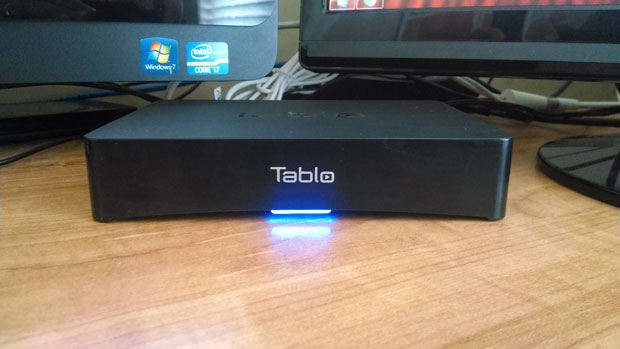
The device isn’t very large, about the size of a larger desktop hard drive. It’s about an 1.4″ high, 6.85″ wide and 4.57″ in depth. You can put it just about anywhere that gets good reception in your house with the antenna and WiFi. I’ve got it on the desk behind the monitor right now, but will likely be moving it onto a shelf in the office, connected directly to the router for a good internet connection for streaming.
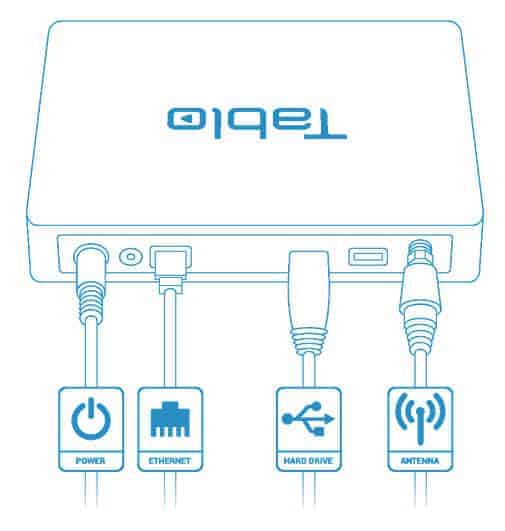
To get started with the Tablo, the first step is to connect all the proper cords to the back. In their manual they say to connect it in the following order:
- Connect your HDTV antenna.
- Connect your USB hard drive (up to 2TB in size). (Only one hard drive is currently supported, although they say they’ll allow two in future firmware updates.)
- Connect to your home network, hard wired via the ethernet port (Or via WiFi later on if you prefer).
- Connect the power cord, and plug in your device.
After you’ve setup the device it’s now time to set it up for use on your home network. If your device is hard wired you can just go to http://my.tablotv.com/ and then go through the setup wizard to get the device working.
The setup wizard will walk you through doing the initial scan for channels in your area by choosing your zip code location and then doing a scan for channels. You may want to scan more than once with the antenna in different locations if your first try doesn’t give you as many channels as you think you should have. Once you’re satisfied that all of your available channels are showing, you can click the “add to guide” button to accept the channels and start downloading the program guide.
Next in the setup process the wizard will ask you to connect your USB hard drive. If you’ve already connected it you’ll be asked to format the hard drive before it can be used. Depending on how large the hard drive is, it can take several minutes to a half hour or more. For me it took about 10 minutes to format the 2TB hard drive. While the drive is formatting the blue LED On the front of the unit will flash.
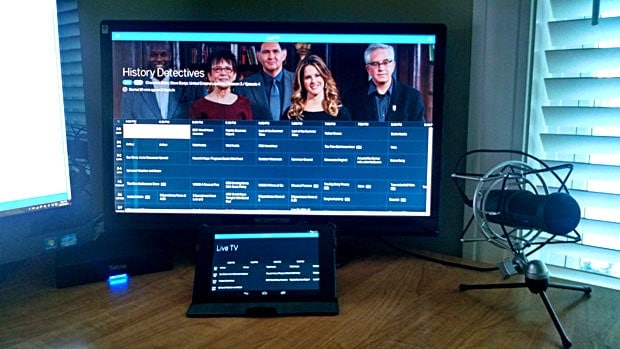
Once the drive is formatted and at least the first day of guide data is downloaded, your Tablo should be ready to use. Here’s a look at mine in use via the Web app on my desktop computer, as well as the Android app on my Nexus tablet.
Using The Tablo DVR
Using the Tablo TV DVR is extremely simple. To get started you just fire up the app on your preferred device, or on your computer, and the DVR interface will appear. Here’s a quick look at the main screen with the menu popped out.
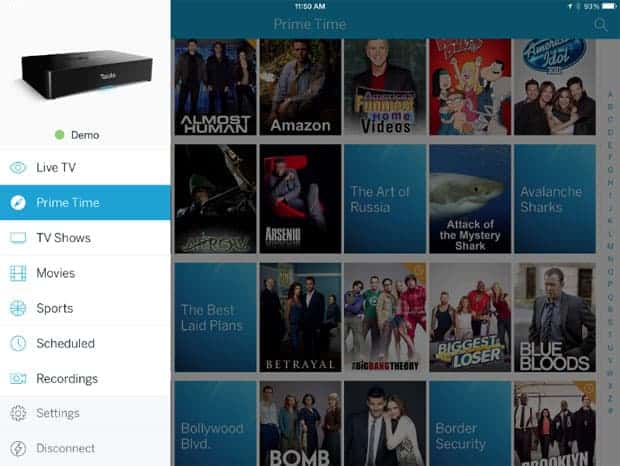
The Tablo app will typically default to the Prime Time shows page, but you can set the default page in the settings.
Once you’re in the app you can pop out the main menu where you’ll see the following options:
- Tablo Device Name (It will show the name of your Tablo device, and whether it’s connected)
- Live TV (view a grid of live TV and upcoming shows. View synopsis of episodes, record upcoming shows, etc)
- Prime TV (listing of prime time shows for the next 2 weeks in your market)
- TV Shows (listing of TV shows in the next 2 weeks.)
- Movies (listing of movies in the next two weeks)
- Sports (listing of sports for the next two weeks)
- Scheduled (a listing of shows you have scheduled to record. You can also view if there are recording conflicts here, and resolve them)
- Recordings (a listing of your recorded TV shows and movies)
- Settings (change your device transcoding settings, edit channel lineups, enable remote access, and more)
Watching live TV on your preferred device is easy. You just go to the Live TV page, and click on the channel you want to watch. You can also pause the show if you need a quick break, and resume when you’re ready.
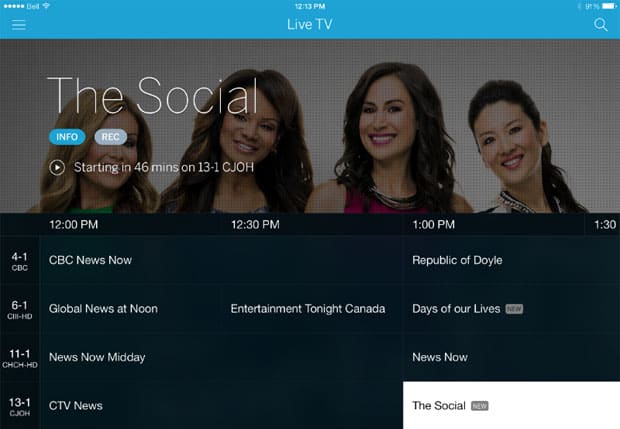
If you want to record one of the shows you see in the grid, you can click on the show to view more details about the episode, and to set recording options for that show (record a series, record all, record new). Once you set a program to record the “REC” button turns an orange color and will then show up in your scheduled recordings tab.
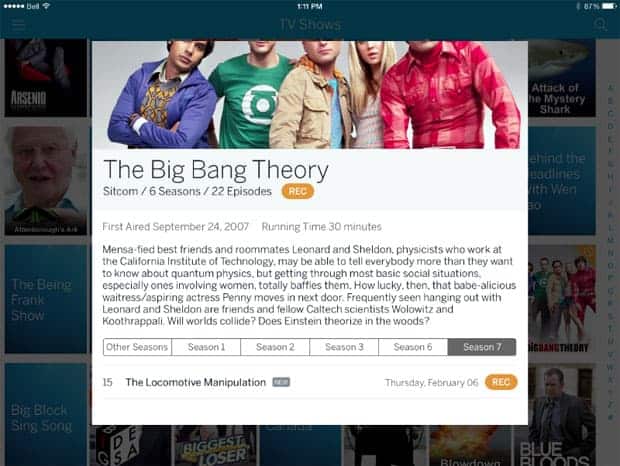
When you’re viewing your recordings, the Tablo video player has some of the options you’ve gotten used to on your cable company DVR. For example, you can watch a recording even if the show isn’t over yet, and it will allow you to skip forwards all the way until you get back to live TV. It has a 30 second skip button to aid you in skipping commercials, as well as a 20 second back button in case you skip a bit too far.
If you want to watch your recorded content on the big screen, you can do that using a TV that has an Apple TV, Roku or Chromecast attached. For me I was just able to start watching a show in the app, and then click on the “cast” button to send the show to my Chromecast attached to the 50″ TV in my living room. Casting worked flawlessly, although there was a bit of buffering at first when you first start watching. Otherwise watching shows and skipping commercials worked without a hitch, except for one instance when the stream just froze.
All in all it’s a pretty simple process to watch and record over-the-air shows with the Tablo DVR.
Downloading Recorded Shows
One thing that I wanted when I got my Tablo was a way to download the recordings to my local hard drive, so that I could warehouse TV show and movie recordings to a large hard drive and watch them using my Plex Media Server. Unfortunately, as of the time of this writing Tablo does not have an official company sponsored way to download the recorded shows from your Tablo device.
There are user created tools available, however, that will allow you to download your recordings from your Tablo so you can bring them with you on the go, or put them on a media server. The one I use is called Tablo Ripper. You can download the free program, which was written by another Tablo user, here:
Again, this is not an official Nuvvyo created software, so use it at your own risk. I’ve been using it for close to a year, however, and it works great. It rips the files into Plex-compliant .mp4 files that are categorized by show name, season, and episode numbers, and that show up correctly in my Plex Media Server.
Once I have .mp4 files that are ripped using Tablo Ripper, I run the resulting files through a software called MCEBuddy.
MCEBuddy removes commercials from the final files, giving me a final file that has no commericals and is optimized for my Plex Media Server. Highly recommended.
How Much Does It Cost?
When you buy your Tablo DVR you’ll be paying for two separate things, the Tablo DVR up front, and then a subscription cost if you want updated guide information.
Tablo DVR Cost
The cost for the Tablo DVR itself varies depending on which one you buy, and where you buy it. It comes in two flavors, one with 2 ATSC tuners, and one with 4 tuners.
- Tablo Dual OTA DVR: Retails for $149.99
- Tablo Dual HDMI OTA DVR: Retails for $149.99
- Tablo Quad OTA DVR: Retails $199.99
- Tablo Quad HDMI OTA DVR: Retails $199.99
- Tablo Quad 1TB OTA DVR: Retails $239.99
If you shop around you can usually find it for a better price, and you can often find refurbished units for a discount on the Tablo company store.
Tablo Subscription Cost
The Tablo DVR works best when you’re paying for a subscription to their program guide data and other subscription features. What do you get when you pay?
Tablo Electronic Program Guide (EPG) Subscription Features:
- 14 days of guide data
- Rich cover art
- Series and episode synopses
- Schedule recordings by time, episode or series
- Schedule full series recordings
- Filters to view content by type, genre, etc.
The cost for the subscription is as follows (The subscription costs are per Tablo. So if you have more than one Tablo DVR, you pay the fee per device.):
- Monthly Subscription: $4.99
- Yearly subscription: $49.99
- Lifetime subscription: $179.99
So there is a recurring cost that you have to figure into the equation, but when compared to competing services, it still comes out to be a more affordable alternative in most cases.
You can use the Tablo DVR without paying for the subscription features, however, it will essentially function just like a VCR used to in the old days. You’ll have to record shows by setting a scheduled recording for a channel, date and time. No series recordings will be available, no narrowing by genre or type and no full-featured episode guide. TV guide data is available online, and you can still set manual recordings with no issue if you prefer.
Tablo DVR – A Cord Cutters Dream Machine For Over-The-Air Content
If you’re looking to cut the cord, but still want the convenience of being able to record all of your shows like you used to with your cable DVR, the Tablo DVR is in my opinion one of the best options currently available.
Tablo will allow you to record your favorite shows, whether it’s recording all new shows, recording all episodes or just recording the one episode you wanted to watch. The guide information is rich and full of useful information, including show and movie covers that give you a better idea of what the content actually is. Not only that but it gives you the option to stream live TV or recorded shows remotely, which is something even your old DVR probably didn’t do (at least not without an extra fee and add-on device).
Tablo has now become a part of the cord-cutting program at our house along with the following devices and software:
- Google Chromecast (To receive streamed shows on the big screen TV from the DVR, Netflix, Amazon, etc)
- PlayOn Streaming & DVR Software (For recording and streaming all the online video content through one convenient source).
- Mohu Digital Antenna (To get over-the-air TV content to view live and record using the Tablo DVR)
- Netflix (Great streaming video content, including some pretty awesome original shows)
- Amazon Prime Instant Video (To view their hundreds of free TV shows and movies, and the occasional movie rental)
- Tablo DVR (To view and pause live TV, as well as record shows and movies)
So if you’re looking to cut the cord and want a cheaper alternative to the cable company’s DVR for your over-the-air TV content, I would highly recommend checking out the Tablo DVR.
Check out the Nuvyyo Tablo Over-The-Air DVR




Very extensive review here of the Tablo, Peter. Who might benefit the most from getting this device? And is this similar to Roku?
Aaron, thanks for stopping by! You can essentially think of this as the DVR for folks who don’t want to pay for cable or satellite TV. It is a DVR for over-the-air HDTV content. It basically allows you to watch live TV, to record TV shows from your TV guide, or set scheduled recording by series – all episodes, new episodes only or single episodes. Beyond recording over-the-air shows you can also stream those recorded shows to any of your entertainment devices be it a Roku on your main TV, a tablet, a smartphone or your desktop computer. Basically – it allows you to record shows and watch them anywhere. When 94 out of the top 100 most watched shows are on broadcast TV anyway, it makes a lot of sense to cut the cord and use something like Tablo.
one thing about tablet is that it is slow to sync. it takes for ever, with a 300 MB connection syncing is horrible, the app for iPad is bad and good luck getting support on a weekend. While the picture quality is amazing and recordings are great, the one day guide with PAID subscription is a joke. If I’m paying why can’t they just offer me 2 weeks worth of guide info on the tv guide? sure i can search, but sometimes, i just wanna browse shows…
Another issue is that it sometimes cuts off and this is annoying…specially with an top of the line $300 AC 5ghz router or even wired connection, the signal gets stuck and doesn’t load. for the price, hassle and lack of features (should be called a beta product) this is not ready for primetime yet.
I haven’t had major issues syncing with my Tablo, but that is almost always on my home WiFi network. I can’t comment on the iPad app as I’m an android user. The Android app had issues for me after I upgraded to Android 5.0 on my tablet, but they just released a new Tablo Web app for Android phones and tablets, and that one now works flawlessly for me, i can actually cast to my Chromecast again.
I haven’t found it to be a problem not having more than 1 day on the Live TV guide. I actually find it easier to search on the TV or movie tabs and their 2 weeks of data for what I’m looking for. Or you can search by channel – so i don’t miss having the Live TV guide go more than 1 day.
I haven’t had any issues with the device freezing – or the signal getting stuck. Not sure why yours is doing that.
I will admit that here and there I have found quirks with their device, but the major issues I’ve found have already been fixed in firmware updates.
I was seriously thinking about getting a Tivo Roamio OTA, plus 5 Mini-Tivos but I ran into something that was a deal breaker for me. Tivo Doesn’t support Sling TV and that was going to be the centerpiece or my streaming channels, in addition to the OTA channels. Tablo, on the other hand, will pick up the same channels, has the same four tuners, and uses the highly regarded Roku as their recommended TV adapter, in addition to Apple TV, Chromecast, etc. Tablo also doesn’t try to eliminate Sling TV. Tivo locks you into their EcoSystem and basically wants to dictate what services you can receive by requiring that all TV’s have a Tivo-mini to connect them. Where a number of new streaming services will probably show up in the next 12 months, the Tablo provides the flexibility to grow as the market changes. It was a no-brainer for me.
Below are your words i just cut/paste, my question is @the bottom …if you want to watch on your big screen tv need compatible device? The only one I had from your list is Apple TV & we do have xbox one!
What you wrote:
“You can view your content on a computer, a tablet through the app or via your TV with a compatible device like the Google Chromecast (which I have), Roku 3, Fire TV Stick or Apple TV. So no direct connection is needed (but if you want to watch on your big screen TV, a compatible device IS needed)”
Teresa, the Tablo is connected to your network, but isn’t directly connected to your TV – it doesn’t have an HDMI out or anything like that. It will stream over your network or via WiFi to your device.
In your case, if you have an Apple TV that should work fine. Just download the Tablo app from the app store, and connect it to your Tablo, and it will sync your recorded shows to your Apple TV so you can stream them over your network. There is also an app for Xbox One.
Hi, Peter –
Great/thorough review! I love my Tablo and have been running it from the start. I’ve always been frustrated by the lack of a simple non-techie download option (like Netflix downloads) so I created an Android app to provide this functionality. It also functions as a quick Tablo viewer. Folks who enjoy this article might enjoy the chance to check it out!
Full disclosure: it’s a paid app, but is totally free to try-before-u-buy kind of thing. Hope it’s of some use to some folks. I use it to watch movies on my train ride to work :) It’s called ota2go and you can see some details at http://www.locobright.com/ota2go
Cheers!
– Steve
Hi, Peter.
I really appreciate your thorough article; very informative and helpful! We just recently became cord-cutters, and all of this is still new to me.
I’m interested in getting a Tablo DVR (2 Tuner), and I want to ensure I have all the things necessary to use it. We have a Vizio Smart TV (model, without web browser), Roku Streaming Stick, and Moku HD antenna.
Based on what we currently have, the only thing we would need to get then would be the Tablo DVR ($219.99), and the monthly subscription ($4.99), correct?
Also, regarding the 2 Tuner DVR vs. 4 Tuner: Does that involve how many devices you are streaming? (We will only be watching from our Vizio.) I’m still learning as I go, and also what questions to ask.
Overall, is there anything that I’m leaving out as far as the components needed to use a Tablo DVR, as well as the costs involved?
I believe your assumptions are correct. If you have a Roku hooked up to your TV, all you should need is the Tablo device and subscription. You can find details about Tablo and Roku here: https://www.tablotv.com/for-roku/
The 2 tuner versus 4 tuner means you can record 2 versus 4 shows at one time. One tuner would be required to tune in and record each show. So if you have 4 shows on TV at the same time that you want to record, you would need a 4 tuner to record them all, or with a 2 tuner you’d have to choose which 2 shows you want it to record. Tuners do not have anything to do with how many devices you can stream to. At our house at times we stream TV shows to 3 different devices (Fire TV, Computer, Phone) at the same time with our 2 tuner.
There are times where I wish we had the 4 tuner device as there will be a sporting event on one channel and two of our favorite shows on other channels. Having a 4 tuner comes in handy from time to time.
If you check the Tablo store on their site, from time to time they have refurbished 4 tuner (and 2 tuner) devices available at reduced prices. I see a 4 tuner on there for $119.99 right now. Our Tablo that we own was a refurbished device and it is going on 3 or 4 years solid now.