For quite a long time my family has been interested in finding ways to save money on our home entertainment options. One way we have done that is to cut the cord on cable tv.
We did our research and found that with new digital standards, the broadcast over-the-air television options at the time were better than they had ever been. Over-the-air transmission gives us HD definition broadcasts, and in many areas you can find 50-70 TV channels available for watching on your TV, for free! In the years since, the options have only improved.
In 2015 we discovered an over-the-air DVR from a company called Nuvvyo. It was called the Tablo DVR. We did a full review of that 1st Gen Tablo device, and after it was complete we continued using the device because we loved it so much.
A month or two ago the company that now owns Tablo, Scripps, announced that they would be releasing a brand new 4th generation Tablo device. They offered to send out one of their new DVRs for us to try, and we jumped at the chance.
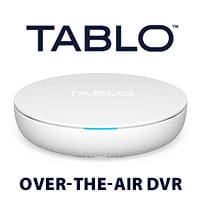
This article is our review of the new 4th generation Tablo over-the-air DVR.
Unboxing The Tablo 4th Generation DVR
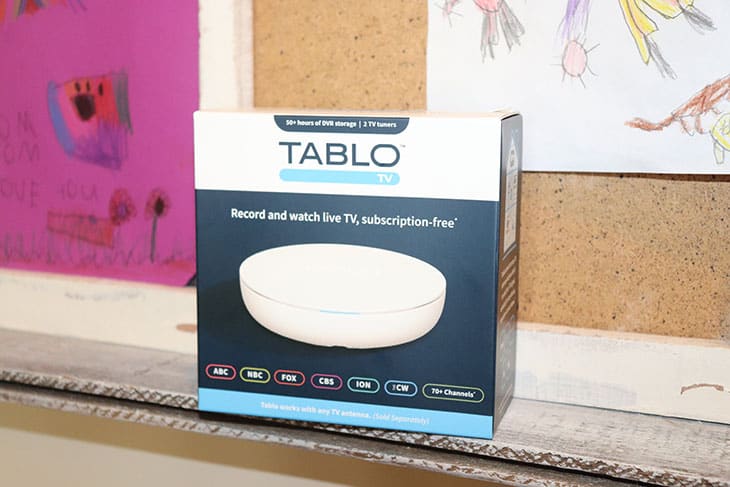
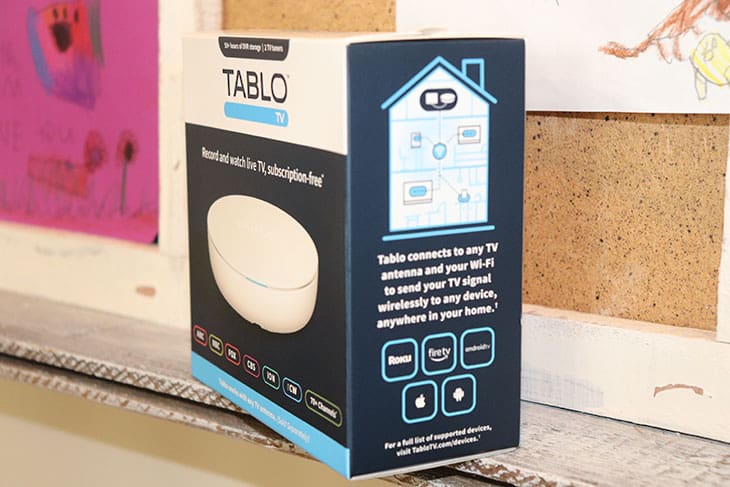
We received the 4th generation Tablo in the mail in a small box that you can see a photo of down below.
So what's included in the box?
- Tablo 4th Gen DVR
- Power Cable
- 4' Ethernet Cable
- Quick Start Guide
- Wall Mount Anchors and Screws
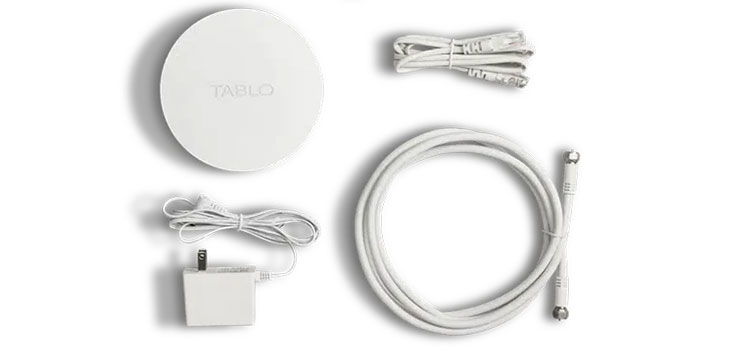
While you have most of what you need to get started included in the box, there are a couple of things you'll need to buy separately if you don't already have one laying around.
- A 1TB to 8TB USB hard drive (for recording shows or pausing live TV).
- An ATSC HDTV antenna, for bringing in the broadcast signal in your area.
Here is a video we took while we were unboxing the Tablo 4th generation device.
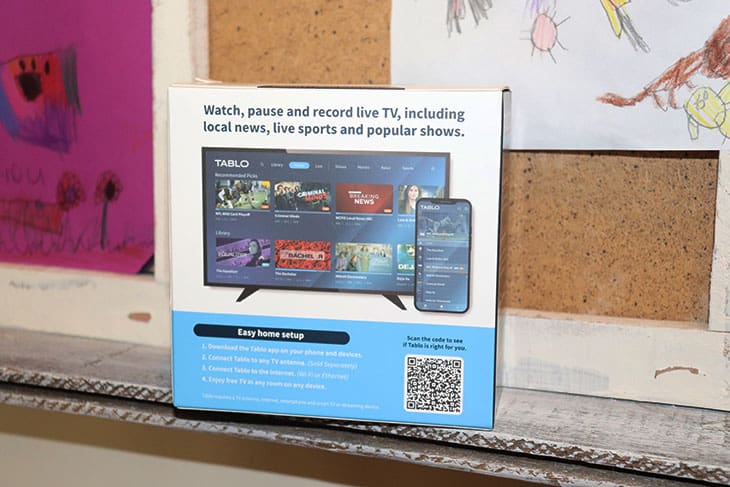
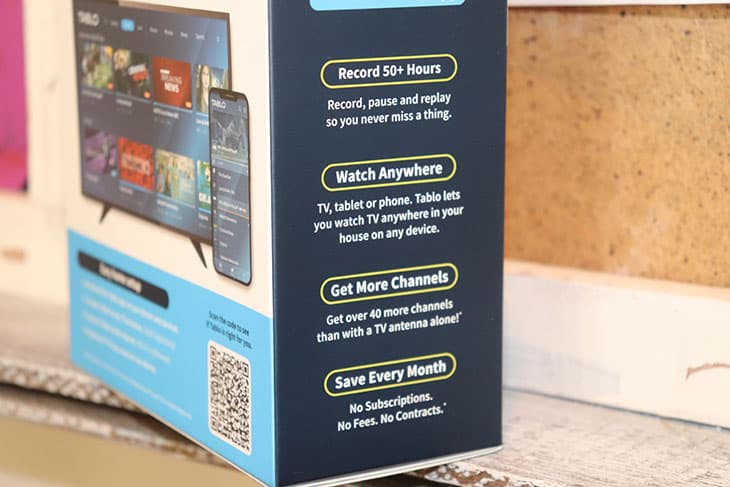
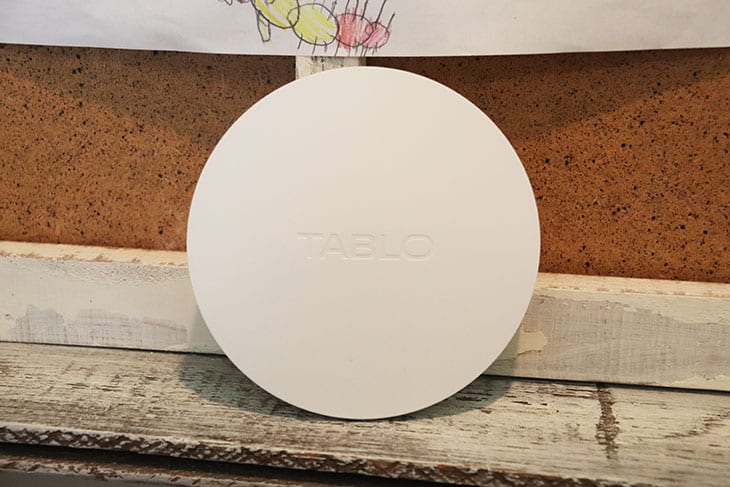
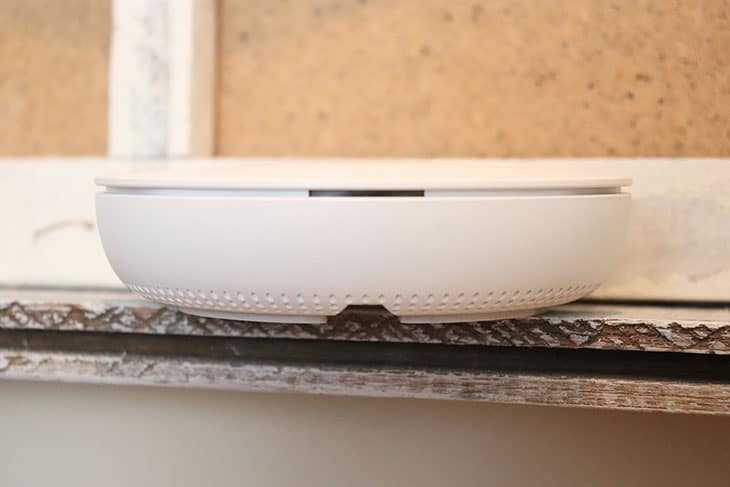
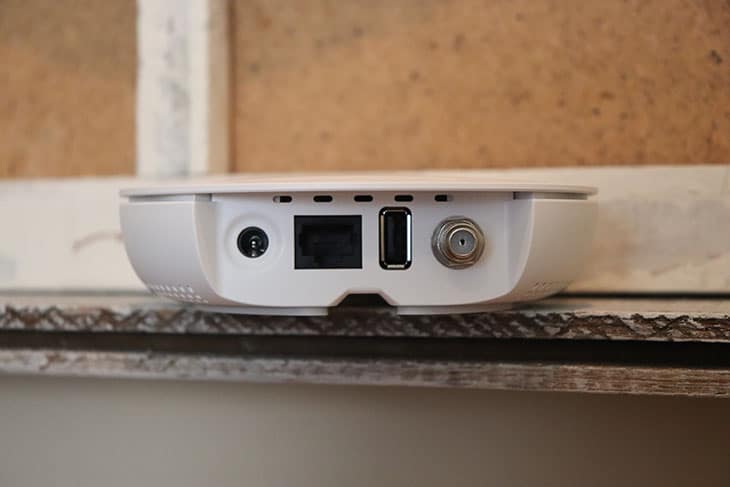
Here are some photos of the Tablo device and packaging.
Tablo 4th Generation Device Specs & Features
So when you take the Tablo 4th Gen DVR out of the box, just how big is it?
- Size: Tablo 4th Gen DVR: Height: 1.38", Width: 5", Depth: 5".
- Weight: 0.38 pounds.
When compared to our original Tablo 1st gen device, it's less than half the weight, and almost two inches less in width. They have definitely downsized some of the components in the last few years.
Here are some of the specs of the device:
- 2 ATSC 1.0 digital tuners.
- 10/100 ethernet port.
- 802.11ac dual band WiFi with MIMO.
- 1 USB port supporting up to 8TB in storage.
- 1 Coax antenna port.
- Built-in antenna amplifier: 11dB gain per tuner 75 Ohm impedance (input and output) Can be turned off if using external amplifier.
- Upgradeable firmware.
- 128GB Flash Memory
- 1GB RAM
- Recording Resolution: 1920 x 1080
- Audio Format: Pass-through of 5.1 Surround Sound
- Video Format: MPEG-2, MPEG-4 (recordings saved to onboard storage will be transcoded to MPEG4 to maximize capacity).
- Manufacturer's Warranty - Parts: 1 Year.
Tablo 4th Generation Features and Functionality
So what are some of the things that you can do with the new Tablo 4th Generation DVR?
- Watch, pause and record live broadcast TV.
- Watch, pause and record 40+ streaming TV channels.
- Skip commercials.
- Schedule recordings for individual shows or entire series.
- Record up to 2 shows at the same time.
- Watch on up to 6 devices in your home simultaneously.
- Stream live or recorded shows on Roku, FireTV, AndroidTV, Google TV, Android, iOS (And more devices coming soon).
- Browse TV shows by type, genre, recommended shows or by favorited channels.
- Browse live programming with the integrated Live TV guide.
So the new Tablo DVR allows you to watch and record all of your favorite TV shows, movies and sporting events on all of your connected devices in the home. Whether it's a TV, tablet or smartphone, apps are available for most popular platforms.
Things You'll Need For Your Tablo 4th Gen DVR
The Tablo 4th Gen DVR comes with most of what you need to get started, but there are a few things that you may need to buy separately.
- An antenna: Check out the Mohu antennas we use here, however, if you want you can also buy a package from Tablo that includes an antenna for a few dollars more.
- USB hard drive: While not required, you'll probably want to get one if you plan on recording more than a few shows. Connect a USB 2.0 or 3.0 hard drive, 1TB to 8TB in size to add space for recordings. Tablo recommends Western Digital Elements drives and Seagate Expansion drives.
- Internet Connection: You'll need an internet connection in order to use the DVR. You can either hardwire it with the ethernet connection (recommended), or use a WiFi connection. I connect mine directly to the router.
- A connected device: Most people already have one these days, but you'll need a connected streaming device in order to watch live TV or recordings from your DVR. Currently they support Roku, FireTV, AndroidTV, Google TV, Android, iOS (And more devices like Apple TV coming soon).
Setting Up Your Tablo 4th Generation Device
Setting up your Tablo device should be relatively simple. At our house we had the device up and running within 10-15 minutes.
Here is the process as laid out on the Tablo support site.
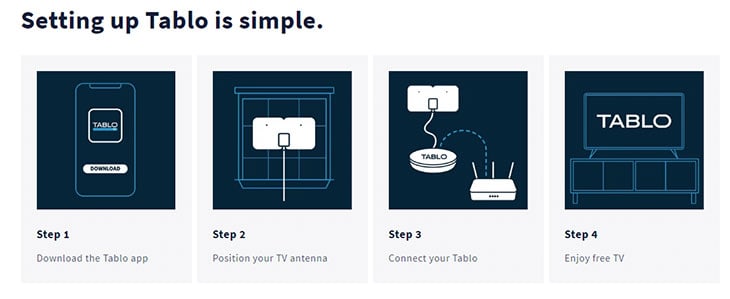
- Step 1: Download the Tablo app.
- Step 2: Position your TV antenna.
- Step 3: Connect your Tablo to the antenna, hard drive, network connection and power.
- Step 4: Open the app on a connected device and start watching and recording live TV!
Download The App And Begin The Setup Process
Downloading the app for the new Tablo should be simple, they have apps for iOS and Android that you'll need in order to complete the setup process. (Make sure that you don't download the legacy Tablo app, but the new app).
Once the app is downloaded you'll proceed to the next steps of positioning your antenna, placing the Tablo DVR and then hooking it all up.
Position Your Antenna
When placing your antenna for your Tablo device you'll want to ensure that it's placed somewhere with a clear line of sight towards the TV towers closest to your location.
In our location we have TV towers mostly located to the northeast of us, so we point our antennas in that direction. Find where your towers are through the site below:
Once your antenna is placed, make sure you have power and ethernet ports nearby. In my case my antenna is in my office, along with our router, so the device can live in the cabinet with my router and another Tablo legacy device.
Connect Your Tablo Device
Once you've found a spot for your Tablo DVR, it's time to hook up all of it's connections.
Plug in the connections in this order.
- Plug in the antenna's coax cable
- Plug in your hard drive
- Plug the ethernet cable into your router
- Plug in the power cord and power up the device.
Setting Up The Tablo Using Your App
Once everything is powered up, it's time to open up the app on your device and attempt to connect to the Tablo to begin the setup wizard.
When I did this it connected immediately and presented me with a screen notifying me that the device needed a firmware update.
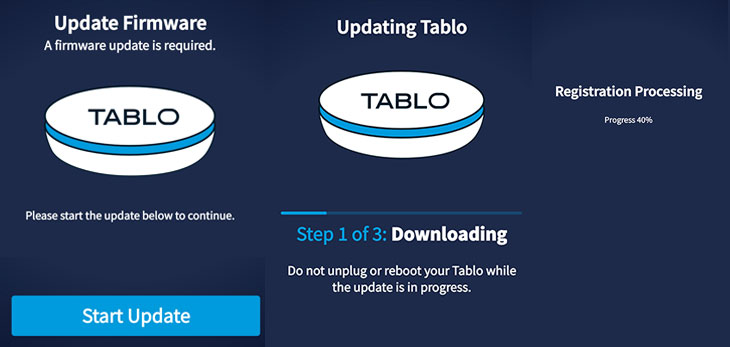
After downloading the firmware update the device rebooted and installed the update.
Next it asked me to register a new account. I originally tried registering the same email address as I use for my legacy Tablo, but I had problems getting it to work. After some research I found that the support site says you have to use a different email if you already have an account for a legacy Tablo device, which we do. I chose a new email, and the registration process went through just fine this time.
Next was the process of scanning for channels. I put in my location's zip code and the device started to scan for channels. It found 53 over-the-air channels with good reception that I saved to my guide.
The device also now includes 40+ streaming channels that you can watch and record, in addition to whatever you receive using your antenna. In my case i saw 43 additional streaming channels and I chose 41 of those to add to my guide.
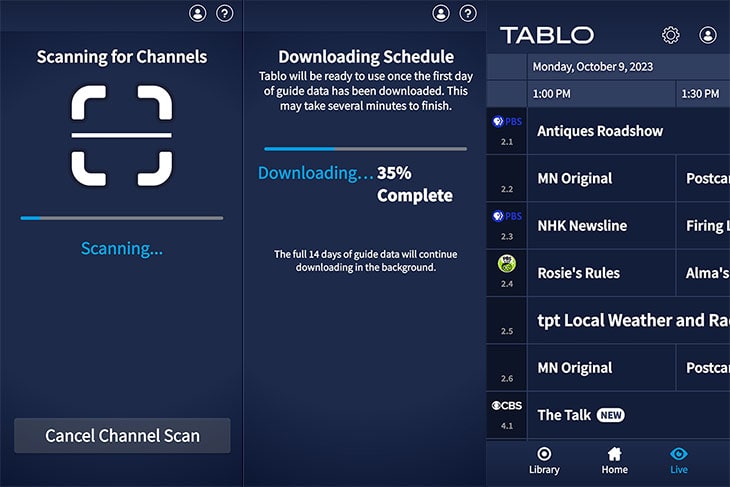
When all was said and done I added 94 channels to my Tablo's TV guide. It began downloading the schedule, which it said would take several minutes. It ended up taking about 7-8 minutes in my case. Once it was done my Tablo's live TV guide populated with the data for the next 24 hours of programming, while it continued downloading data for the next two weeks in the background.
Using The Tablo DVR - The New Interface
The interface for the new Tablo DVR is completely changed from the last iteration of their device. It has a new design and feels a lot faster when it comes to load times, whereas the previous version could lag a bit sometimes. If you want to see what the previous one looked like you can see it in our previous review here.
The new interface looks not unlike a lot of other streaming apps on the market. It has a homepage where you can discover new content, by genre, recent recordings or by favorite channel.
To start watching a show you just click on "watch live" on an episode or click on the show thumbnail. You can also view more episodes of that show by clicking on the "more episodes" button, which takes you to a page where you can set a series recording, or record upcoming episodes of that show.
If a show isn't currently live it will take you to an episode page where you can set a recording for the upcoming show.
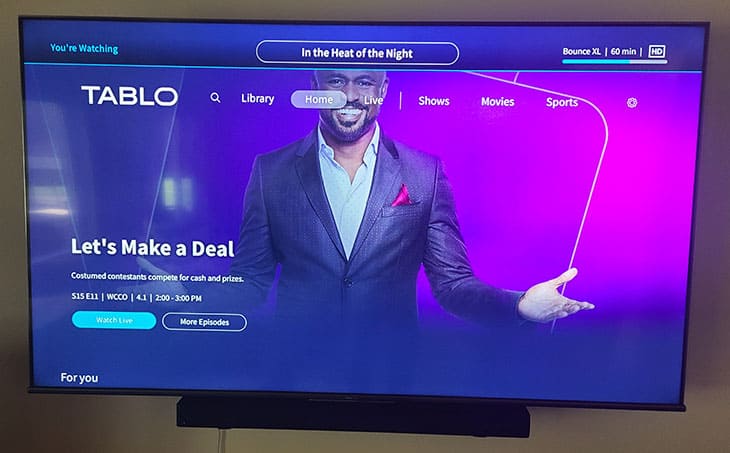
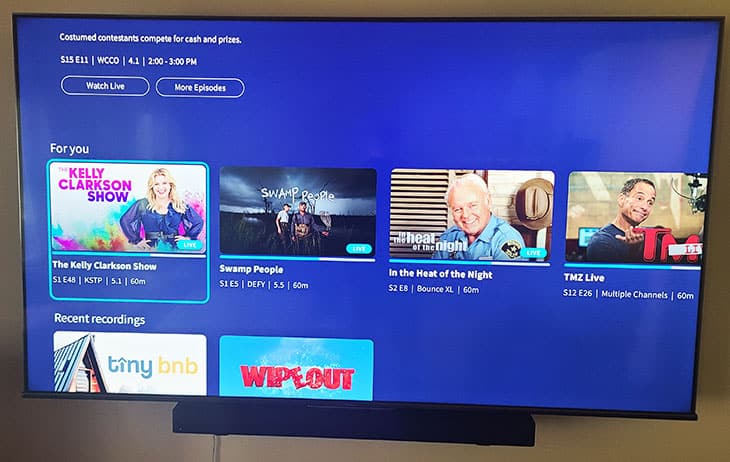
The page will break down the available content into categories like recent recordings, live sports, upcoming network premieres, trending, featured shows, live news, morning shows, crime and drama, talk, reality TV, comedy, westerns, history and more.
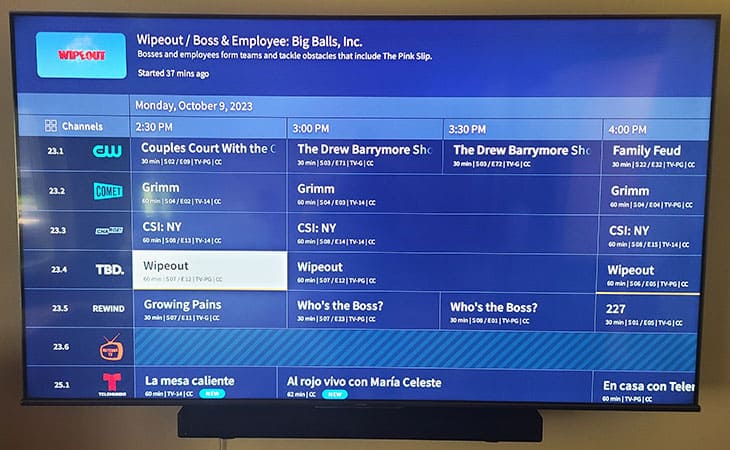
On the "Live" tab of the app, you'll see a familiar live TV grid showing you what's on currently, as well showing upcoming programming. you can either click on the channel logo to the left to watch that channel live, or click on a program to view the detail page with cover art and a synopses for that particular show.
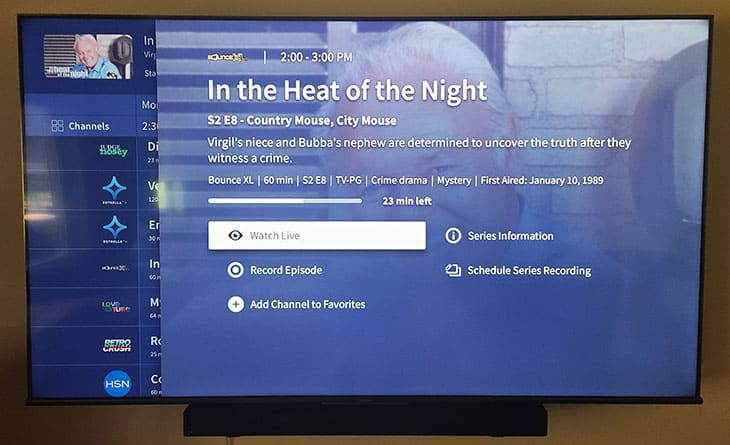
On the program detail page you can choose to either watch a program live, record the episode, add the channel to your favorites, or view detailed information about the series. Or you can schedule a series recording.
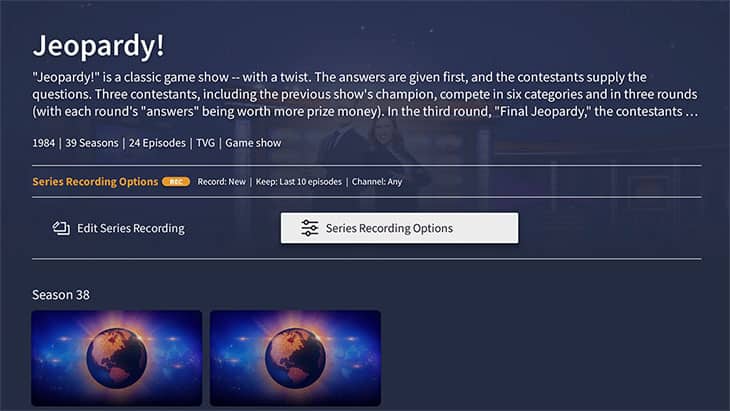
If you go to a series recording page you'll see a listing of upcoming airings of the show, along with a synopses of the show. If you want you can set a series recording to record all episodes of a show, or only new episodes. You can also tell it to keep a specified number of episodes. For example you could have it keep the last 10 episodes. You can also tell it to only record a show if it appears on a specific channel. Once your shows are recorded they'll be saved together under the series detail page on the "Library" tab of the app.
On the "Library" tab of the app you can view any of your recordings for all of your favorite shows, movies and sporting events. At the top will be a listing of "Latest Recordings", followed by a listing of upcoming scheduled recordings.
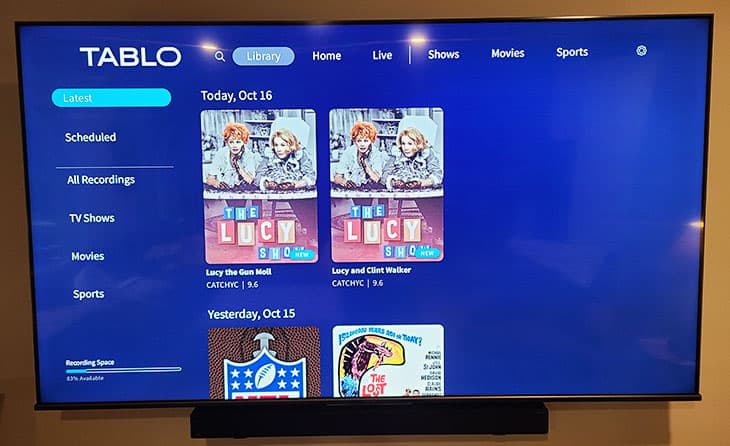
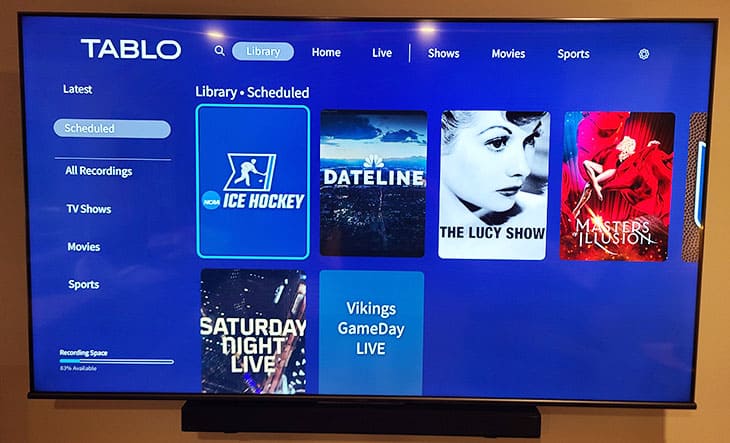
Finally you can view recordings broken down by categories like "TV Shows", Movies", "Sports" or "All Recordings". Once into one of those pages you just click on the show you want to watch, and then choose the episode to start playback.
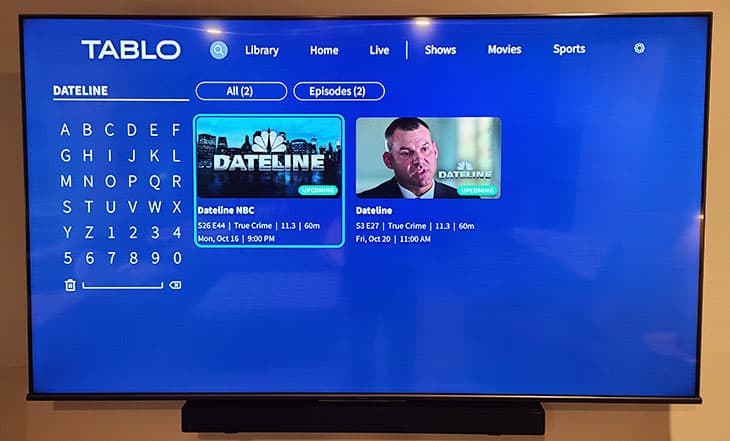
Finally, there is a search tab where you can search for your favorite show, movie or sporting event. Just type in what you're looking for using the on screen keyboard, and if there is an airing of that show in the next 2 weeks it will come up. For example, below I searched for the TV show "Dateline". Two episodes of the series comes up in the results, showing when it airs and what channel it's on. You can click into the show to schedule a recording.
The new interface for Tablo DVRs is very nice to look at, user friendly, easy to navigate and loads super quick (which wasn't always the case with the last interface). It's definitely a joy to use.
Tablo 4th Generation DVR Cost
When you bought the Tablo DVR in the past there were two separate things you would be paying for. The Tablo device itself, and then a subscription cost for the updated 14 day live TV guide, series information and show artwork.
With this new 4th Gen Tablo DVR they are doing away with the subscription fee, and now the only thing you have to pay for is the Tablo device. They currently have two packages to purchase on their website.
- Tablo 4th Gen 2-Tuner DVR $99.95
- Tablo 4th Gen 2-Tuner DVR & Antenna $129.95
From time to time you'll see sales on the purchase price or refurbished DVRs for sale at a lower cost, but even without that the device is very affordable at less than $100.
Tablo 4th Gen DVR Pros and Cons
There are a few pros and cons to be aware of when looking at purchasing a 4th generation Tablo DVR.
Pros
Here are a few pros of the Tablo DVR.
- Watch live TV and timeshift your favorite shows (pause live TV).
- Record your favorite TV shows, movies and sporting events.
- Set series recordings to record all shows, only new shows or individual shows.
- Set sporting events to go long in case the event doesn't end on time. Never miss the end of the game!
- Set shows to only keep X number of recordings. For example, I set it to record my local newscast every night, and only keep the last 3 episodes.
- Browse content in the all-new Tablo interface which makes content discovery much easier. Browse by content type, genre, channel or by favorite channels.
- 40+ new streaming channels are now available to watch and record to augment the over-the-air content. Channels are available to stream from Bloomberg TV, Docurama, Gusto, Outside TV, PAC-12, Tastemade, Comedy Dynamics, Fubo Sports, Court TV, Dove Channel, History Time and many more. Find a whole channel list here.
- Full rich program guide with 14 days of guide data, rich cover art, series and episode synopses and filters to view content by type and genre. All at no cost unlike previous versions of Tablo.
Cons
There are a few cons that I felt I should mention when it comes to this new Tablo DVR.
- No ATSC 3.0 tuners: A lot of people are getting excited for ATSC 3.0 broadcast standard, however, this device only has 2 ATSC 1.0 tuners on board. There may be a future device with ATSC 3.0 tuners, but currently this device is ATSC 1.0 only.
- No out of home streaming: This Tablo DVR does not offer out of home streaming of your live TV and recorded shows. The legacy versions of the Tablo DVR do offer that, however. So if you want to be able to stream your shows when you're out and about or on vacation or something, you may want to look into the legacy devices.
Tablo 4th Generation DVR - A Great New Iteration For The Best Over-The-Air DVR
I've been a big fan of the Tablo family of DVRs since we discovered them back in 2015. We've been using our original 1st generation network connected Tablo ever since.
The new Tablo 4th Generation DVR revamps the interface and back end of the device to take it to the next level. While it doesn't have an ATSC 3.0 tuner, and no longer allows streaming outside of the home (at least for now), the new interface is a joy to use, and the streaming quality I've experienced thus far has been very good. It also now has a ton more entertainment choices with it's 40+ new FAST streaming channels.
The device also no longer carries with it a monthly subscription fee, which is something that should put this DVR near the top of everyone's list. The fact that it also carries with it a purchase price of less than $100 is the icing on the cake.
I'd highly recommend checking out the Tablo 4th Generation DVR if you're looking to save some money and cut the cord on cable TV and/or other streaming services.




Share Your Thoughts: