Mother’s Day is an important day at our house. I believe it’s important to show mom that she’s appreciated and loved, and this year we wanted to do something special.
My wife had been hinting for a while that she would like to have some sort of keepsake that involved our son’s handprints, so that she could save them for posterity.
After doing all sorts of hunting around for the right craft project – from paintings to pottery – I settled on a fun paint your plate project that I found on Pinterest.
The project was simple to complete, and I thought it might be helpful to do a quick how-to tutorial of how my son and I created this project so that others can do their own!
Quick Navigation
Tools Needed For Your Painted Handprint Plate
Creating your handprint plate isn’t too hard, as long as you have the right tools to do the job.
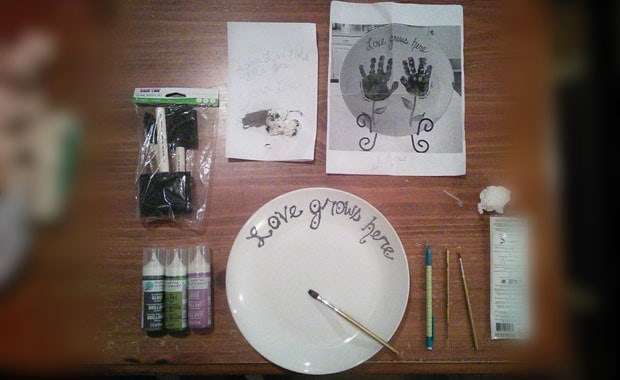
- 1 white oven-safe ceramic plate: I found the pictured oven safe plate at Target for $3, but you can likely find one at your local thrift store for less.
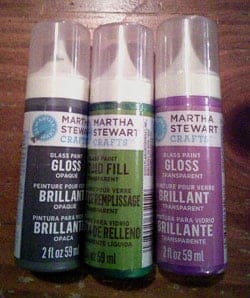
- Pebeo Porcelaine 150 Paints: This paint can be applied on porcelain, china, glazed earthenware and more. Once it dries you can bake it in the oven for 35 minutes at 300°f, and it will come out with a nice enameled finish. The colors are permanent, microwave safe, uv resistant and have high resistance to dishwashing and to normal detergents. This project called for three colors: Black, Green and Purple. You can do whatever colors you would like, however. (You can also use these Martha Stewart glass paints for the project if you can’t find Porcelaine 150)
- Pebeo Porcelaine 150 Paint Pen: If you want to make it easier to do text or other finer paint work, you can also use these Porcelaine 150 paint pens. Much easier for writing text.
- Foam paint brush or painting sponge: In order to get a nice even coating of paint on my son’s hand I used a foam paint brush, and that worked pretty well. Others have suggested using painting sponges like these ones to get a nice even coating of paint on the hands.
- Soft #2B Pencil: You can use the pencil to pre-draw any designs on your plate, or even better, transfer your drawing onto the plate.
- Paper towels & wet wipes: Have some paper towels and wet wipes handy both for wiping off your painted mistakes (before they dry), and for wiping the paint off your child’s hands after they press their handprints
In the end I had to modify the tools used a bit because the Michael’s store i went to didn’t have the Porcelaine 150 paints in stock. I ended up using some Martha Stewart glass paints. I was told by a store employee that they should work about the same as the Porcelaine 150, and they did. They just had slightly different baking instructions to harden the paint.
All in all I spent somewhere around $20 for all the materials, mainly on the paint and brushes.
Creating Your Handprint Plate
Now the fun part, actually creating your handprint plate.
You’ll want to create a nice workspace where you’ll have plenty of room to work, while still having all of your materials handy.
Doing The Lettering
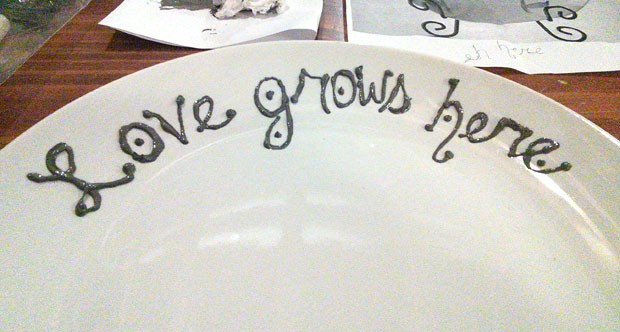
I started my project by painting the letters on the top of the plate. I plotted the letters out first by writing them out in pencil, to make sure they would fit.
Next, after I had the words down in pencil I used my glass paint to write the letters. The paints I was using had a nice tip for outlining in paint, and that worked pretty well for writing the letters. They were a bit thick when I was done, but they looked decent. If I were to do it again I think I’d probably use a paint marker instead (linked above) for the lettering.
After doing the letters I decided to let the paint dry overnight before I got my son’s handprints on the plate. I didn’t want him to smear the letters that took so long to get right. If you prefer, you could do the handprints first, then the lettering and rest of the design.
Placing The Handprints
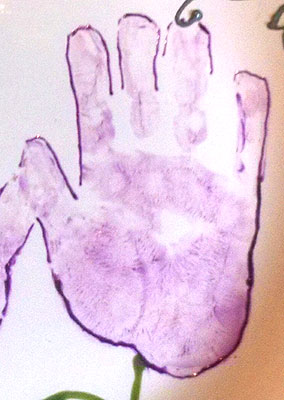
First I squeezed out the purple paint onto a plate, and dabbed it onto my foam paint brush, evenly coating it. I then applied a thin coat of paint to my son’s hand.
Be careful not to use too much paint. If you do it can smear or show less of the hand’s actual prints in the design.
After the paint was applied to my son’s hand I had him press his hand gently down onto the plate while I pressed all of his fingers and center of his hand down. Make sure you know exactly where you want the hand to go, before you place the hand and press down.
Next, I had him lift his hand directly up without smearing. It took two tries on the first hand, and I had to use a towel to remove the smeared handprint from the first try.
After the first hand was complete, I wiped his fingers clean with a wet wipe, and repeated the same steps on the second hand. After he was done I had him wash his hands thoroughly.
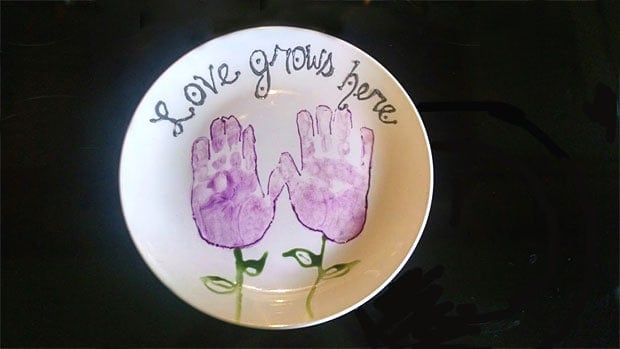
After the handprints were down on the plate I did a slight outline of the prints using the same color paint. You can skip this step if you prefer.
Completing The Design
After the text and handprints were down, I proceeded to complete the handprint flowers by painting the flower stem and leaves.
Using a small paintbrush and green paint, I painted the stem and leaves freehand, after putting down a pencil outline.
The paint wasn’t mixed very well the first time so the paint was too thin and started to run down the sides of the plate. I wiped it all off and gave it another shot after re-mixing the paint. This time it took and looked pretty decent.
Making Your Design Permanent – Bake It!
After completing the design it was time to make it permanent.
- First, you have to let the paint dry for 1 hour. After it’s dry it’s time to bake the porcelain paint to harden it.
- Place the plate in a cool oven and preheat it to 300°f.
- When the oven reaches 300°f, bake the plate for 35 minutes.
- Turn the oven off and let the oven cool with the plate still in there.
Since the paint I used was slightly different it had me heat the plate to 350°f for 30 minutes, but essentially the same instructions.
Once the plate has cooled in the oven you can take it out and your paint should now be permanent, and dishwasher safe.
My paint had indeed hardened and felt like ceramic or glass to the touch. The green paint actually looks like translucent green glass. Very pretty.
Easy Project That Will Be Much Appreciated
Once the project is complete your plate will look amazing, and I’m sure be much appreciated by the recipient. I know my wife loved the gift when we gave it to her on Mother’s Day!
The only problem we had was keeping it a secret since my son loves to tell his mother everything. This time, however, he did good. He only let it slip that there was a “secret gift” for mommy!
This project was a lot of fun, and you can use the same steps for other projects besides handprint plates. You can paint your own ceramic coffee cups, bowls, wine glasses and more. Give it a shot, and let us know how it turns out for you!


Can I substitute for acrylic paints?